



In day-to-day work with reports, you may want to display different information depending on the situation. For example, when sending documents to customers, the wording in the header should match the process:
Without conditions, you would have to decide on one of the two names for the field. As a sales or administrative user, you want your documents to automatically show the correct information based on the document data, ensuring clear communication with your customer.
In a previous HowTo, you already learned how to set conditions for Report Lines. This HowTo builds on that functionality and shows you how to define conditions for Header Lines.
Let’s have a look at how you can set this up!
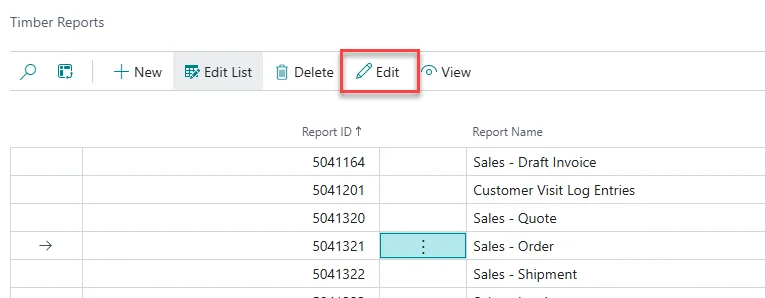
Open Timber Reports.
Select the report you want to modify, e.g. Sales – Order.
Click Edit in the top menu to open the Timber Report Header Setup.
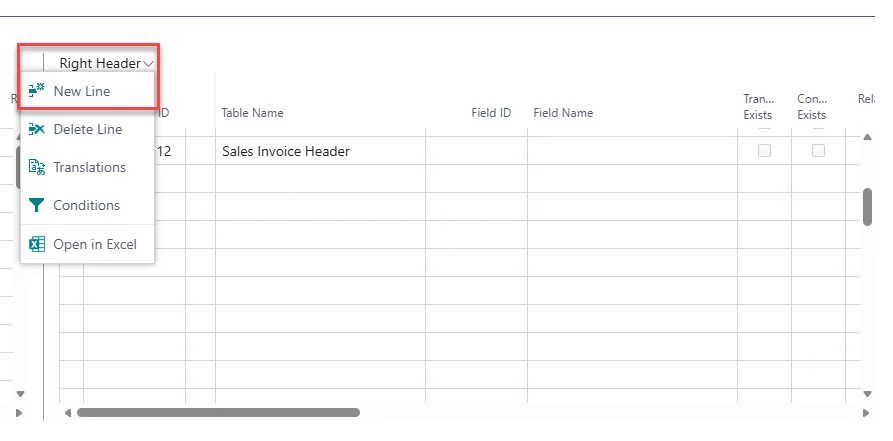
Create a new Line in the Right Header of the Report by clicking on Right Header > New Line in the Header FastTab.
Enter the following values for the new Line:
While selecting the Line, click on Right Header > Translations.
Select ENU as Language Code and enter Shipment Date in the Description.
Repeat steps 4 and 5 to create a new Line with the same values. While selecting that second Line, again click on Right Header > Translations. Select ENU as Language Code and enter Pickup Date in the Description.
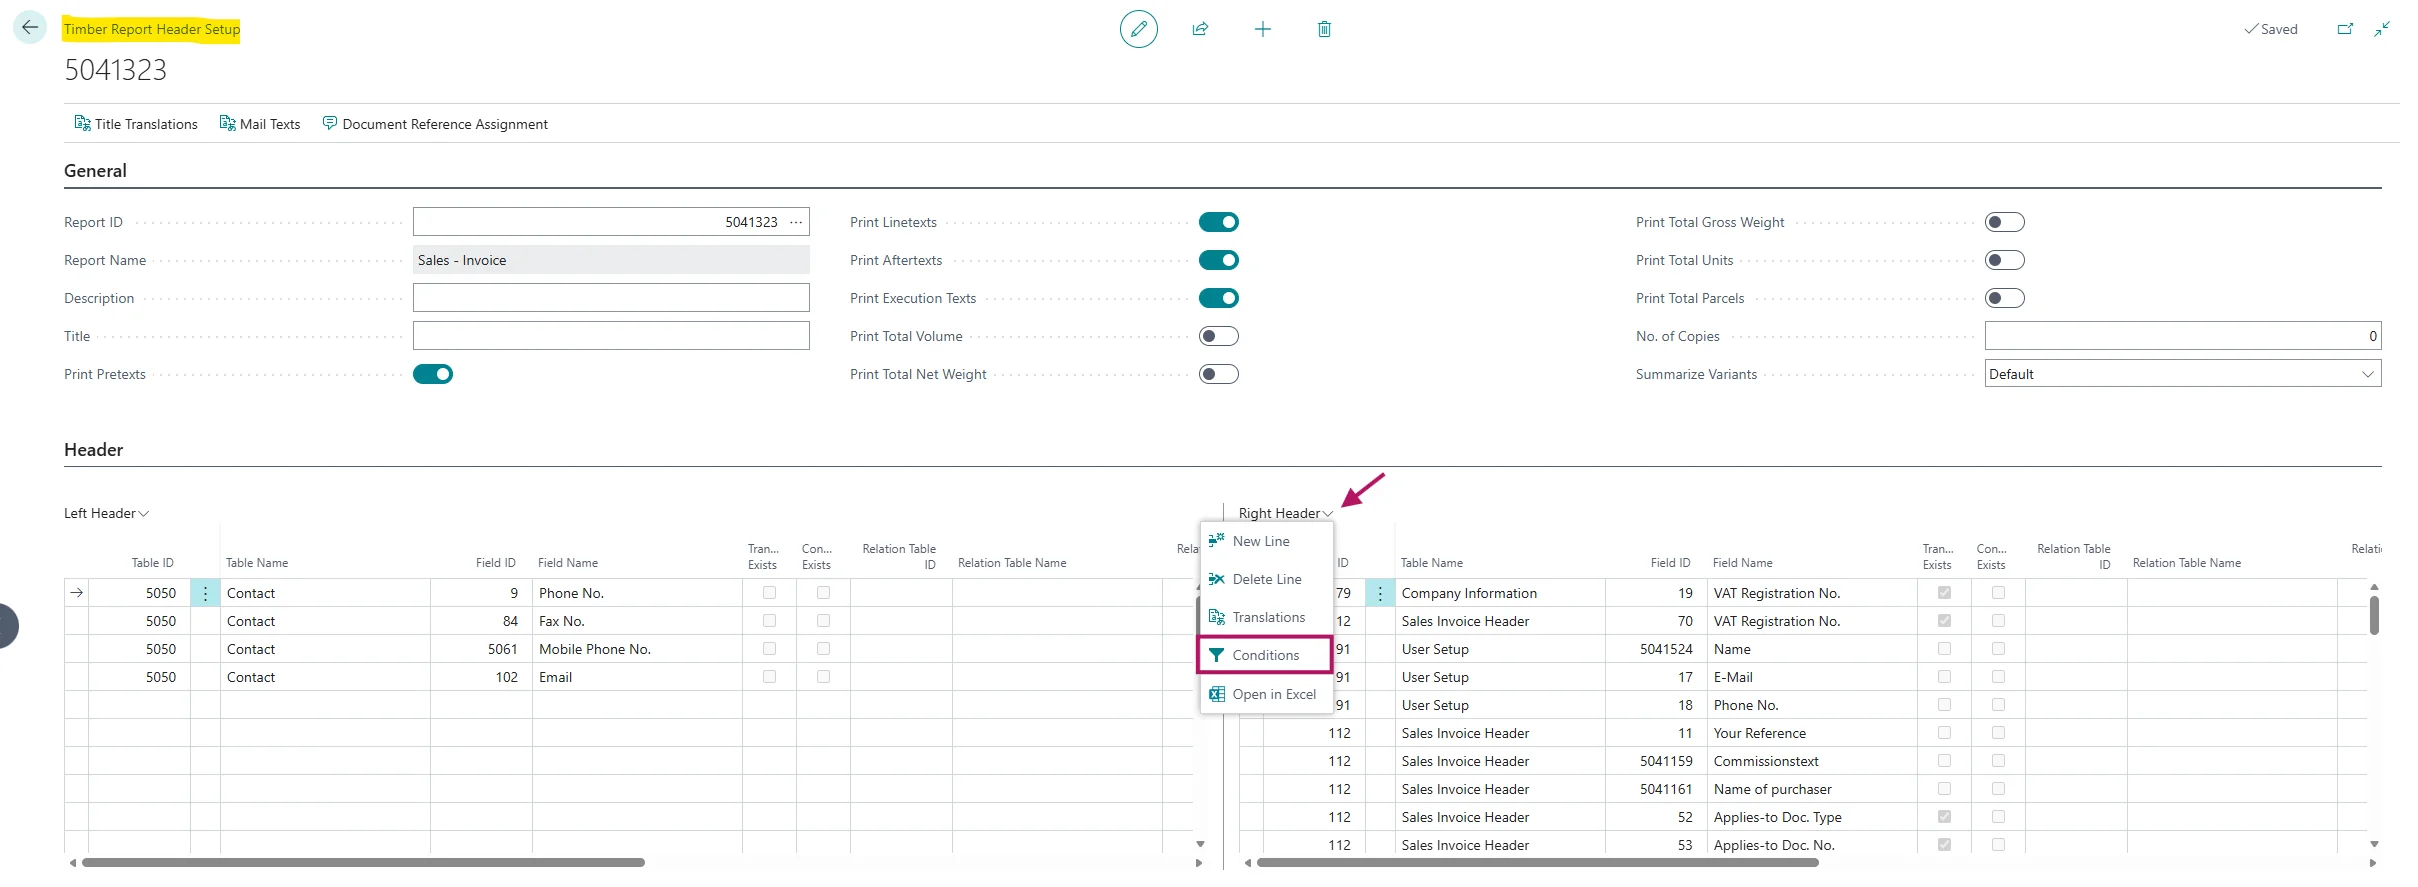
Now that we’ve created two Lines that both show the Shipment Date, but with a different label, we should decide when each Line should be shown. To do so, select the first Line you created and click on Right Header > Conditions.
In the Condition Table ID field, select the table on which the condition should be based, e.g. 36 – Sales Header.
In the Condition Field ID field, select the field from the document header that should be evaluated, e.g. 27 – Shipment Method Code.
Enter the desired filter in the Filter field, e.g. <>PICKUP if you only want to show this field if the Shipment Method is not PICKUP. Make sure to select the Shipment Method Code(s) that your company has set up for orders that will be picked up.
Repeat steps 9 to 11 for the second Line you created.
In the Filter field, enter =PICKUP to only show this field if the Shipment Method is set to PICKUP. Again, make sure to select the correct code that is used in your company.
Close the Timber Report Header Setup.
Open the adjusted report, e.g. in this case a Sales Order and select the Shipment Method Code which you set up for pick up in the General FastTab.
In the top menu click Print/Send > Print Confirmation and in the window that opens click on Preview.
Close the preview, select a different Shipment Method Code and repeat step 17 to see a different label is shown for the Shipment Date.
With conditions in header lines in Timber Reports, you can control which information is displayed based on defined filter criteria.
This ensures that your documents remain clear and easy to understand for your customers, without additional programming effort.