



As a sales employee, you regularly send documents such as sales quotes by email directly from Business Central. When these emails are sent, you want them to contain your company’s preferred wording, a personalized subject line, or additional information for your customers.
Over time, your communication style may change, or you may want to add new information to the email. If you do not know where this text is maintained, you may assume it cannot be changed and continue using outdated wording.
Let’s see how you can adjust the email text that is used when sending documents.
Open doc.box Report Setup.
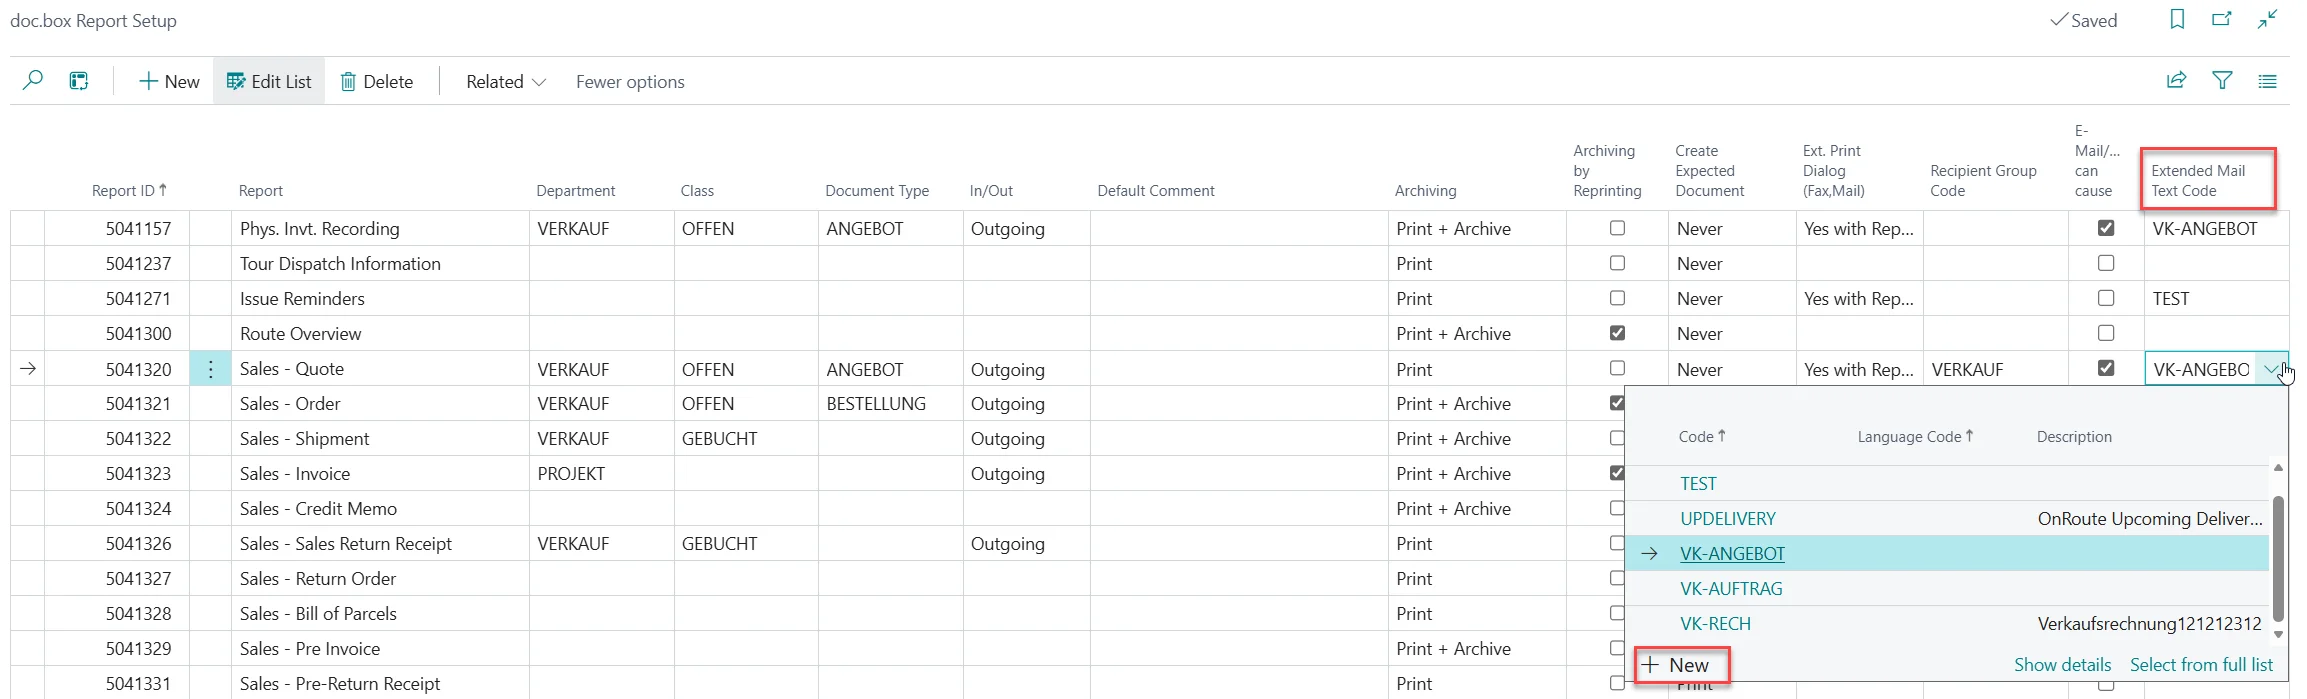
In the list, find the line for the document type for which you want to change or create the e-mail text, for example Sales Quote, and click on the drop-down arrow in the Extended Mail Text Code column.
Click on + New to create a new mail text.
Enter S-QUOTE as Code, Sales Quote as Description and click OK.
The created Extended Mail Text Code is now entered in the Sales – Quote line. Click on the drop-down arrow again and click on Show details.
In the window that opens, under Parameter, you can find several placeholders which you can use in the email subject or text.
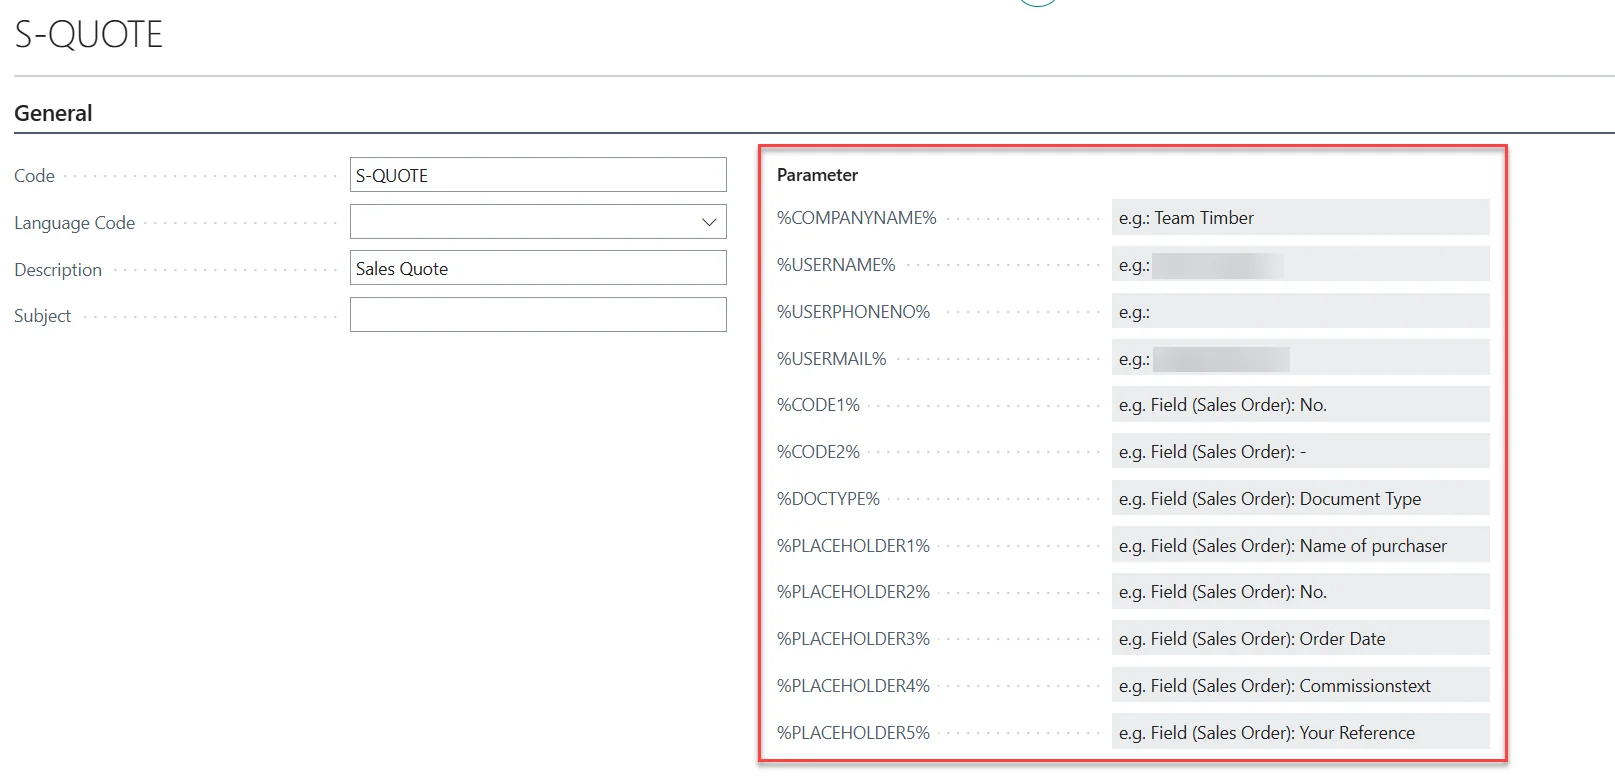
Fill out the Subject field with the text you want to appear as subject in outgoing emails. For example, with Sales Quote %CODE1% from %COMPANYNAME%.
In the Lines FastTab, enter the text which the email should contain. Here you can also use the existing placeholders.
Per Line of Text you can define if it should be a New Line and/or should be printed in Bold, Italic or Underline by checking the checkbox in the respective column.
To try out what your newly created Subject and Text look like, open an existing Sales Quote.
In the top menu, click Print/Send and Send by Email.
In the window that opens, select the Receiver by checking the checkbox in the Active column for the correct line and click OK.
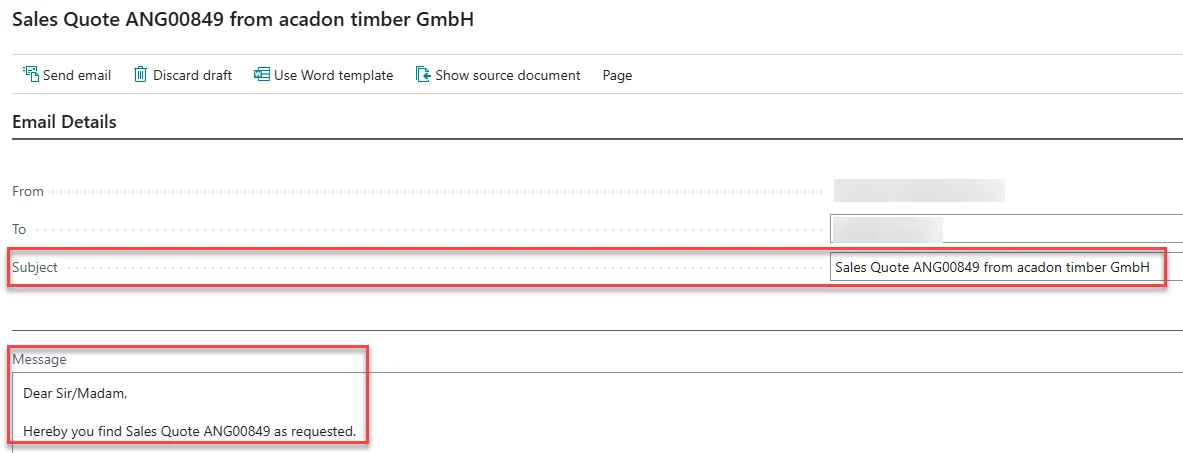
In the window that opens, you can check the Subject and Message which now reflects the setup of the Extended Mail Text Code.
By maintaining the email texts for your documents, you can keep customer communication up to date and ensure that outgoing emails contain the correct wording, subject, and company information. This helps create more professional communication and reduces manual editing before sending documents.