
In HowTo 003 you learned how to use analysis mode to evaluate data directly in Business Central. Often, the standard list of fields is not enough.
As a warehouse manager, you want to analyze which items are returned most frequently and also see the Item No. and Item Category Code directly in the analysis. As a sales manager, you want to evaluate not only the customer data but also information from the Contact table in the customer list.
Previously, you needed a developer to add these fields. With the new Add columns from feature, you can now add this information yourself directly in analysis mode. This saves time and makes your analyses more flexible and meaningful.
Let’s see how to add additional information from related tables directly in analysis mode!
Open the list you want to analyze and turn on Analysis Mode.
Click Add columns from and Other source in the action bar.
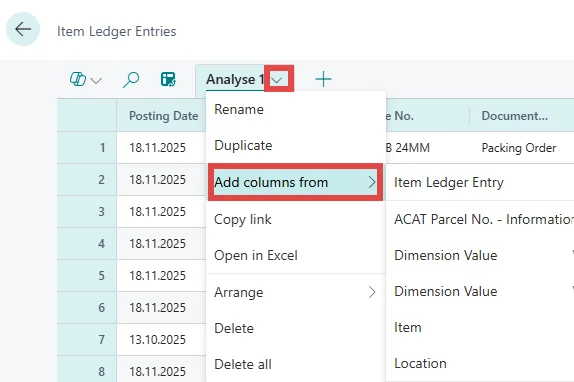
A dialog box opens. Here, you can find all tables that are related to your current list.
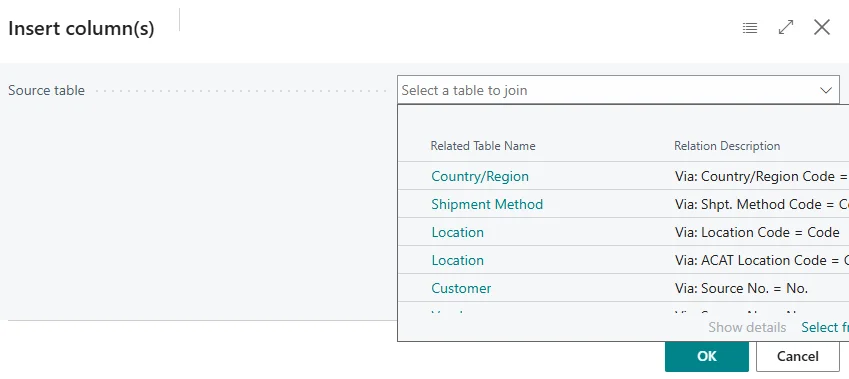
Find the related table you want, for example Location or Customer, and select it.
Select the columns you want to add. You can select multiple columns at once. Note that the technical field names from Business Central are displayed.
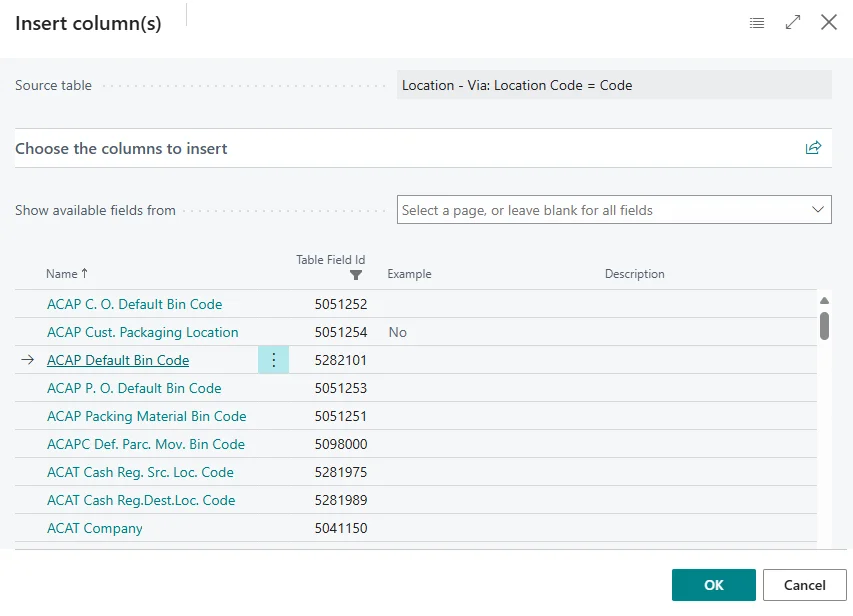
Click OK to add the columns to your analysis. The new fields now appear in your analysis view.
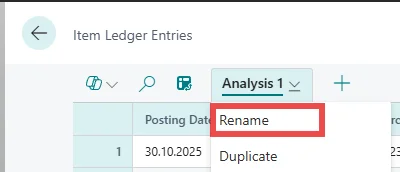
When everything is set up as desired, you can rename the analysis and give it a meaningful name. It will be automatically saved and is available for reuse at any time.
With this new feature, you can expand your analyses in analysis mode flexibly without relying on a developer. This way you always keep track of all important information directly in Business Central for any list you want to analyze.
Since this is a standard Business Central feature, you can find more information from Microsoft at: