
While most work processes become paperless when using Business Central, some reports still need to be printed, and in some cases, processed afterwards because they contain notes or require signatures. Examples include Bill of Parcels, Sales Shipments and Warehouse Receipts.
You can, of course, manually scan the signed document and assign it to the corresponding Bill of Parcel, Sales Shipment, or Warehouse Receipt in Business Central. However, depending on the number of documents you need to scan, this can be extremely time-consuming.
Moreover, it’s difficult to keep track of which documents have already been scanned, which ones require an additional signed copy, and whether all scanned documents have been correctly assigned.
All in all, there should be an easier way, right?
Let’s see how working with Expected Documents in Doc Box can simplify this process!
First, you need to set up for which reports you expect an additional signed or annotated copy. To do this, go to doc.box Report Setup.
Find the line for each report for which this is the case and use the drop-down arrow in the Create Expected Document column to select one of these options:
For example, select Print for the Sales – Bill of Parcels report line.
Let’s see what happens now when we print a Bill of Parcel, go to Sales Orders.
Click + New to create a new Sales Order.
Fill the required fields in the General FastTab & add at least one Item in the Lines FastTab.
In the top menu, click Print/Send and Bill of Parcels.
In the window that opens, select your Printer and click Print.
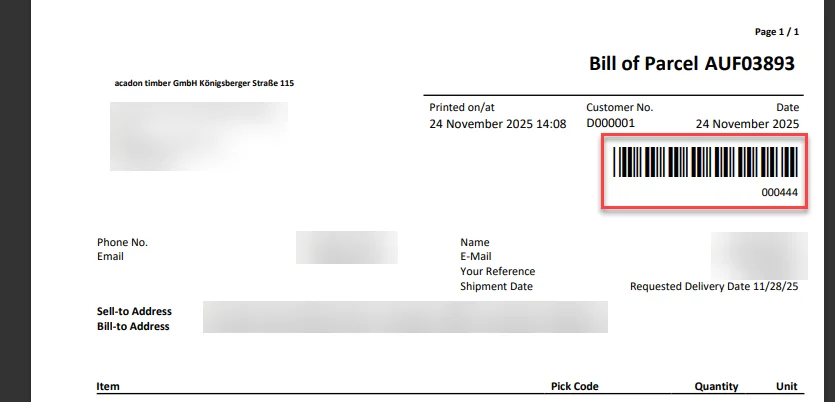
As you can see, a barcode has been added to the printed document.
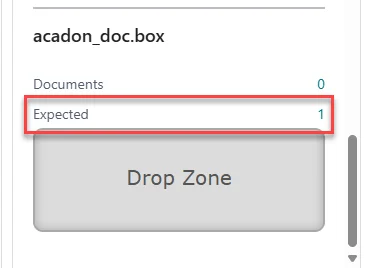
Furthermore, in the acadon_doc.box Factbox of the Sales Order, you see that an Expected Document has been created.
Next, imagine the printed Bill of Parcel document has been signed and you want to add it to the Sales Order. There are two ways to do this automatically, depending on the scanner you have.
To import and automatically assign all files in the designated folder, go to doc.box Batch Import in Business Central.
Select Import and Assign, for Import Type select Azure File Share and click OK.
A notification will pop up showing how many files have been imported & how many files have been assigned, click OK.
Return to the Sales Order you previously created to see that the file has been added as a Doc Box document.
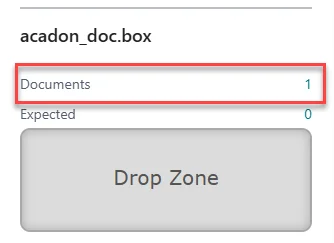
To see if everything went well, there are two points to check.
Now you can easily collect signed and annotated documents and link them to the relevant report in Business Central. This not only saves time but also ensures that all information is stored in Business Central, making it easier to review every step of the process!